 Hello youtubers welcome to this next
session about how to use a multimeter for beginners and in this session we're
going to basically cover off how to measure current that the other
things we are going to do we're going to go through the answer to the question
that I posed on the first session I will then go through just explain some
concepts with that on soap because it does help with an understanding of a
hand electricity works particularly AC. And DC I'll then posed a new question
for the next video that will review and then we'll get stuck into the actual how
to measure count with a multimeter so for those of you may have started
this video looking for a quick three or five minutes solution on how to measure
current you're not going to find it here this video probably run into 20-30
minutes there are loads of videos on youtube which kind of give a quick
simple packed answer to that this video is for those if you want to a
really good understanding of some basic concepts on electricity and how to do
those make those measurements with a multimeter so let's get stuck into it I'll quickly
go through some of the answers now first of all thanks very much to those of you
who did respond to the question I'll just repeat the question again best PR i
asked i say which would which was more dangerous AC power or DC power and I just left it
like that but not out of further detail and a number of you came back and some
of the answers were certainly failure off the mark and not correct that but
that doesn't matter just attempting to answer a question and getting a drunk is
great there's nothing wrong with putting
something out there that you may think is right if you can learn from it if I was
worried about making mistakes and saying the wrong thing I wouldn't even turn that camera on each
time I want to do a video because I'm constantly making mistakes you don't be
scared you don't you make some mistakes jump in answer the question don't worry
and there was some good answers a lot relating to in particular it also depends on the
amount of voltage and the amount of carrot involved which is very true and a
combination of those two is ultimately which can what can be very dangerous and kill you
both on an 80 side and a DC side but the answer I was kind of looking for and
i'll explain more about and if it sparks debate that's fine but basically the
answer that Todd Harrison gave and I read out is is
answer it covers most of what i was hoping to hear but i will then go
further and it kind of brings out a concept that we need to understand
between AC and DC and it is i'm going to say DC is more dangerous to work with
because once you touch something with DC. Your muscles will contract and stay
contracted make it making it impossible for you or others to remove you from the
power with a see your muscles would be pulsing on and off giving your reflexes
a chance to pull away or someone to knock you off the power before it before
even more permanent damage is inflicted and that is very true i can attest to
the fact and this is something I learned when I asked studying my electronics and
the dangers of DC vs AC that's what DC. Does DC is constantly on it's not like
AC which is going to recycle of being on and off and building up and coming on
and off it's permanently on at that voltage and
so in essence if you get a shot from DC.
Your muscles contract if it's a a let's
say a piece of wire or a contact that you're holding on to your muscles
contract and potentially keep you there delivering a a lethal dose of
electrocution well as AC tends to actually throw you
back and I can attest to that was about the week week and a half two weeks ago I
managed to get my shot give myself a shotgun on there - 20 and it threw me back and I said I
set for wild that with a little bit of a shake-up but that's what and AC does to
you so that was the on sighs kind of looking
for and DC is is dangerous in terms of far more aspects DC when it comes to
electrical components hide by DC at high current becomes very challenging and in
fact the components particularly even switchgear switches and breakers become
very complicated because in essence you and this is you weld with DC so the
amount of power you getting when you've got direct current you can weld metals
together with a couple of car batteries and some content you can actually world
things together and switches after 10 amps it's amazing d switches below 10
apps are ready to be cheap to buy you soon as you go about 10 x 15 and to
start approaching 20 amps the contact and break is inside a switch and when
they slept together you potentially get <time> six </time>
and they can actually then well themselves together anywhere quickly i'm
going to put a diagram together and we'll go through that and hopefully
that'll give you a better understanding ok so let's get stuck into that
explanation or the AC vs DC but before we do that again I just want to thank contest again for
the loan all this fluke multimeter for this tutorial and they kindly do like me
this equipment if you follow any of my other videos you realize they actually
let me some quite interesting equipment for particular for the solar side as
well which I certainly wouldn't be able to get my hands on if they weren't on board with this so
thanks very much to them right so let's get in a little closer to this diagram
we don't want to get too advanced or too technical but let's try to get a basic
understanding for my little scribble diagrams here ok so we're going to take so sorry to the
Americans we're going to kind of use a european / that South Africa standard
for this one of an average around 250 volts so if you can imagine your your x
axis over here is time and the y-axis is the voltage now what happens with a see the voltage
goes up to a peak then comes down to zero then goes negative for a while and
then comes up to zero and it repeats the cycle again and depending on where you are in the
world that either happens at 50 Hertz or 60 Hertz which is either 50 times a
second or it 60 times a second now this just to get an understanding
for an average or a comparison to say a a comparative equivalent to a DC voltage
but it's a naughty analogy to make but some people do but to get the average
voltage of what you get in coming out of your mains out later what have you of
230 the voltage voltage actually goes up to a peak of 325 volts and then comes
back down and then goes down to negative 325 bolts so you've actually got a peak-to-peak
voltage of 650 volts now what happens what what we that so
what we doing what the useful voltage for powering your at you at your
appliances or whatever at home is the average under these two bits over here
under these two cycles and that what we are here about the term on a multimeter
cordon RS rms multimeter that means root mean square and that's a calculation to
understand the average of this area under here and that is 230 like ok so as you can see from that so
basically an AC voltage it's kind of like and one energy is like thinking of
and an old steam locomotive with the pistons game back and forth it literally is shuttling back and forth
in essence in that piece of wire doing its work by doing that as opposed to DC
which is just playing straight for the whole time so if we go to the DC side let's say we
had an equivalent DC voltage of 230 volts DC it would look like this and if
you had this on the sill escape that's what it would look like an oscilloscope
you get a nice wave like that representing your your AC over time and
easier to just be a flat straight line like that actual 230 mark that is just
constantly on it's not you you can tell that with an
AC voltage is a lot of time when it's way below that kind of even the 230 at
peaks at 325 then it's coming right back down again and then it hits zero the
negative side all that's negative it's not gonna hurt you but the negative side
obviously it's building building building it hits its peak and it comes
back on and that set by as if you've ever touched a see it gives you that bad
but its contents going on and coming off so it actually gives you a chance to
release or in fact kick you off if you get a shock whereas DC you just getting the full on
to 30 all the time and it will grab you and
clinch you on so that was kind of basically the answer i was trying to get
to and more importantly the reason I wanted
to kind of demonstrate this and it doesn't mean the other answers were were
wrong that then in part they were right in what they're saying in terms of the
makeup between current and voltage and what have you but I just want to stress
how dangerous DC in particular can be generally speaking we think of DC with
little batteries and 12-volt car batches in the course of the twelve cop actually
you can put your fingers on the two terminals it's not going to
shock you why isn't it going to shock you perhaps there should be another question
but it's not going to shock you because it just doesn't have there's enough current in a in a car
battery to do damage but the voltage is low ok and but DC black in particular one
application i can tell you where you can potentially get Heidi sees in solar
panels linked together in series you can get you can get 300 400 500 600 volts
plus and their things become very dangerous if you had to the wires
between two solar panels which were linked in series build with that I DC
voltage together and you had a bag a continuous circuit I you didn't break it
some way and you had count running and you pull that apart at 600 volts you had
been potentially for a lot of trouble because that it would mark it's like
lightning it would off between those those two contacts so that's where you
have to be very careful with the high-voltage DC I SE electronics and
what-have-you different different stories at current levels and the
voltage levels are a lot lower so I want to pose another question for
the next video and that is basically when electricity
was first started being used mainstream and there were power stations generating
electricity and transmitting it to houses for lighting and what have you they initially started off with actually
transmitting DC. Believe it or not and then later
switched over to AC and I'm keen to understand if song can give an
explanation as to why ok so that is the next quiz question for
next week as I said take a stab at it if you run
it doesn't matter but I'm post an answer and we'll discuss the answer in the next
video ok let's jump into what we're here for
and that's to understand how to measure current ok so before I want to go back to the
diagram and give a little analogy again of understanding what current is what i
thought just a quick look back at the this fluke one double seven when we do current
readings we going to be jumping popping these banana plugs into two different in
two different connectors now the black still remain in the common as it does
for all measurements but this time the red will go but either between the 10
amp or your main and pitch which is generally the case almost multimeters
the tenant connector or your milliamp connector and that can vary from
multimeter to multimeter and it can be as low as 200 milliamps it could be five
hundred six hundred milliamps as I said showed you earlier some multimeters just
have all demonstrated here on this week some only have three connection points
and this is more for electricians they just have a connecting point for to
measure and higher values they you can make millions but not down to the
resolution that you can on let's say I'm ultimate like this the wisest thing always is to always
start off in the higher setting down here and i would advise that if you
don't if you are an existing multimeter which is infused i would recommend
getting one that's fused I'd also recommend getting one that
definitely has separate play plug connectors for your courage and it's not
shared with the voltage and we'll cover that why a little bit just now but having
fused points for your milliamps and your answer is important as i said we start
on the higher one when you realize your current level is safe you can then click
down to the lower one but let's get in and have a look and an
understanding about what current is so we're going to go
back to this diagram i did in the first video as i said just like a garden hose
has got water in it just like a piece of wire has electricity flowing in it there's two components which are fairly
similar you have pressure pushing the water out and that we regard as as
voltage and I said it's like tapping in a little hole in the pipe and putting a
pressure gauge in there you can relatively speaking with a few caveats
actually take fairly safely take high voltage readings and because you're just
tapping in through a little hole you just take a reading of your piece of
wire what have you and getting a pressure reading the voltage however when it comes to current it's a
different story for current just like let's say in a pipe this gauge over here
cannot tell you the volume or amount of water flowing in this pipe and that
remember that is current in essence that's your other aspect current is the
same as it's the volume it's the amount of electricity or relating to this
diagram it's the amount of water so to be able to understand how much is in
there you have to put let's say we had a
little pedal inside this flow of water you have to excuse my diagram just
pretend it's a nice little pedal that's in this flow of water which will measure
the volume flowing past it ok and therein lies the little challenge
that we have to be aware of you have to place your measuring device
inside the flow there is a caveat to that America and
I'm gonna come back to that but for the most part for the basic side of
measuring current with a multimeter you need to place your multimeter in the
flow of electricity so when we come back to our multimeter when
you take your probes this time as opposed to say being on the outside of
your circuit in essence and just taking a pressure reading these probes now
become part of the circuit the electricity that you're trying to
measure is going to flow through your one probe and out of the other through
the probe through your multimeter and out the other and that's where measuring parent can be
a challenge because your multimeter has to be able to handle that flow of
current and current can potentially generate heat can melt things if it's
too high and that's why by default most multimeters are not gonna lie to
measure up to 10 amps some can rely to measure 2 15 or even 20 amps but only
for a very short period of time there's not many multimeters that allow
you to measure higher than that the caveat to that is you can measure
current in a safer way and that is something you can do it with a current
tap so as I said you can do it with the
current app or you can do it with a special multimeter that has a clamp and
this clamp basically can read current induced field the magnetic field around
a conductor to measure safely without breaking a circuit high currents but
we're not that there that is something that we will cover in
a more advanced series I just want to put it out there that
there are other ways they are you can even use a current shunt and that is
something else will cover off when we moved to the kind of advanced series of
videos on this topic ok so let's get stuck in we're going to
get something to measure and i'll explain again how are connecting
everything up and how that current is actually flying through your multimeter ok so I've got all the components that
we're going to use for this little too and I thought I just quickly show you
what we've got to go to an essence I car headlight lamp here we've got the
multimeter we've got the probes and we've got some attachable crocodile
clips now someone made very good fair comment in the previous video and we're
stating that if you remember I used those little crocodile clips to click
connect to that led when I was a measuring the voltage across not heavy
and they said that perhaps that wasn't there could be some safety issues of
that now they were did right in that application though not the measuring
voltage you can get away with using a some crocodile clips and thinner wire
but at the end of the day it's good practice to always try and be safe and
the safest thing to do to have crocodile clips on your probes is to get ones that
attach directly to your program like the ones I have here because they can handle
more current but i'll demonstrate that now then the other thing i want to show
you so I've got my variable power supply care which is what we're going to use to
power the headlight I've already got it set at just over 13
volts and the maximum I've got it set to I can vary the current that it's going
to put out I've got to set 2 3 amps and i can tell
you now this car lamp would actually draw far more than three amps if my power supply could put that out
but it's enough to get it started so we'll hook it all up and see how that
works ok so first of all the first thing we
need to check we've got our multimeter as I said
hopefully you've got a multimeter which has separate inputs for measuring
current it's far safer that way potentially they have shared inputs are
on voltage on your voltage input that if you make the wrong selection while
you've got things cabled app you can cause a short and blow things so in the for now as we can see we've
got our black in the common we starting off with our red connector in the temp
connection ok not in the milliamp because
potentially we don't know what kind of going to measure I know ahead of time we know what we're
going to probably see but potentially if you don't know always start in the bigger one ok then what we're going
to do I'm going to clip on these crocodile clips onto the probes make
sure that nice and firmly connected ok then what we're going to do we gain I'm going to connect as rule of thumb on
what I do is basically your life live feed coming from your source voltage
goes to your life or your positive on your multimeter okay then in essence and this is where it gets a
little bit confusing your black probe on your multimeter isn't acting as a
negative this time you feeding you this is one line of the circuit the positive
line of the circuit I don't show you in a diagram but this
is a positive light positive line of the circuit which comes around through your
multimeter it still positive it comes out here so this needs to go to the
positive connection of the load that you're trying to feed electricity to or
your DC voltage - so that's clipped on there like that and then I can directly
take the negative instance is is this side this is the negative side of the
power supply it gets connected like that what we want to make sure is that the
wires are all apart and we're not going to get a short so I've got them laid out
like this let's make sure they're not going to touch they look I'll even pull these wires
apart to make sure not so that looks safe so what I'm going to do next is we need
to select the correct setting on the multimeter so we move around the dark we go past or the voltage selections we've got homes you got
continuity then we've got milliamps now remember i said we're not measuring
milliamps we've gone to the biggest setting amps we put it on two amps and
on this flukes other as i said the thing you do need to note in particular on
this fluke one double seven it defaults to AC ok we're not measuring
a see you get up and incorrect reading so we need to select this kind of second
function back button over here the orange one and that then takes us to DC
as your night on the display there ok so we're all set up let's pull this
up so that you can see what happens when i switch on the power supply i'm switching it on now I don't know if
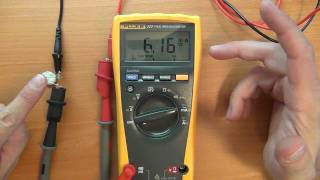
you can hear that there's a nice become that comes next is drawing so much cant
and you can see the light has come on and what are we reading 3.0 30 Amps that's a fair amount of current it's not a huge amount but it's still a
fair amount had I garden use this four hundred
milliamp connection first I blown the fuse it on this
multimeter will it wouldn't have caused any damage but it certainly would have
been inconvenient you your potential not going to have spare ceramic fast fall
off fast blow fuses lying around you're well-equipped if you do so then
you're gonna have to go off to the hardware store and go get the correct
views don't be tempted if you do that by
accident by trying to short out the fuse or put an incorrect fuse or potentially
damage your valuable multimeter so there we go let's get a diagram so we
can just see what we've done here ok so I've got the simple diagram here
and what I'm going to do is I'm work first block the sacks on to demonstrate
in essence what we did the other day when we did the voltage measurement we
had our we had a battery and I said although
it's commonly I just had a single 1.2 Volt sell commonly called as a battery
that is in fact a self that is just one cell that many cells together form a
battery and we had the power supply feeding a load in this case it's the
light and here we then we had our multimeter digital multimeter we have the common which in that case in
essence deep x is your negative because it we work with DC and we had a positive on
either side to measure the voltage now what happens you get your choice of
whether to power supply or a battery feeding your load all of your current
electricity is basically flowing through your load and around like that that your
continuous circuit flying around like that your digital multimeter when you Scott
get it's got it said two bolts has a very high resistance so it doesn't allow
much current to flow through itself it is minuscule and that is how remember
it's like that little patient pressure gauge and put in a pipe it's just tapping in to measure the
pressure okay so it's not in essence really
forming part of the circuit at all now what we're doing today and how we
had things connected up is a different story altogether we've got the power supply and as I said
we had the positive connected to that positive red probe of the multimeter and
then we had the black sometimes referred to as negative you if we measuring DC
but in essence it's the common but that common in essence is feeding the
positive feed out to our low to our light and it goes then through the light
and back to the past plan but as you can see your digital multimeter forms part
of that circuit all that current which you are trying to measure which is
flying through your light source has to flow through your multimeter your
multimeter here in essence has a very low resistance to that flow of
electricity now we're going to learn about
resistance and continuity probably in the next video but that's the important thing to note
when measuring current if you don't have if you don't do something more advanced
like having a carrots tap or current clamp or i sent the common way for
measuring character is like we have it set up now and you have all your current
going through your multimeter so that's the circuit ok and as you
noted we are we are measuring about three amps so now we're going to just
measure something a little smaller to show how can small measure a smaller
current or and page before we get to measuring that that smaller current
there's something I actually want to let which I picked up all doing this
demonstration I'm switch on the power supply again there you go the light comes on this
wire which i'm using from my variable power supply is actually quite cheap why
that I picked up at my electronics shop it doesn't have any rating on it and
neither on on the packing packing that it came in did it have a rating i mainly use this to power small DC
electronics but i can tell you right now even with just three amps throwing
flowing through it I can feel this why I starting to heat
up in my hand it's got nothing to do with this light
source of the heat that a little bit of heat that's coming off here this wire is starting to heat up as we
speak and that is something very critical you
have to note about current is that thin wire can potentially handle quite a high
voltage but when it comes to current it's a very different story altogether
that higher volume that high flow of electricity once bigger wire and that's
something we will we will address again in later videos I say this if you feel why heating up like I
wish the temperature is literally getting very warm that is potentially going to cause a
fire if it is left in that kind of state it also means you have losses you don't
have you lose a lot of your your your energy and power that you try to supply
a source load with ok let's move on ok so now we're going to do a
measurement of the current which is used by the current or that M page which is
used by this little Eddie grade led so I'm going to connect it up and again
remember we've still got the multimeter connected in exactly the same way even
though we know this is not going to use match we're going to err on the side of safety
we've got it connected to the temp connected here we've got the power
supply coming into the red lead to positive which feeds through so remember this is acting as the
positive and then this negative back to the power supply and on the LED you
probably won't see it on the camera but if you're going to try this for yourself
that led you can there are little metal pieces which go
you can see the bigger one is actually the negative and a smaller one is the
positive so that's the way I'm connecting it app over here i'm going to
set that down there i'm going to set my power supply below 1
volt because it won't take much light up this led we've got our multimeter on
ready and remember if you on the one double seven if you happen to change any
of the settings it's going to default back to AC. Remember to use a secondary function key
here to go to DC which is noted as you can see here on the multimeter it's got
in orange the DC symbol above the AC symbol which
is the default which is the default ok so i'm switching on the power supply let's have a look and see that at what
level that led is going to come on let me know if you can see that there you go I've got it happened about 2 volts and
you can see it's at 0.00 8 Amps so it's not a very fine reading but we now know
that it's below the temps so we can safely state right all this
isn't going to give us enough resolution and when I use the term resolution if
you want to understand the terms accuracy and resolution you can I've got a good video which i'll add a
link to on this one now so you can go and view which explains all about a
resolution and accuracy but the resolution here and it's perhaps not
enough for us to understand exactly what this is using so now we can go and
change things out that i'm going to switch off the power supply I'm going to simply change the red
connection . To the 400 million amp ok as you saw four hundred milliamp it
wasn't near 400 milliamps on the multimeter we can now go to the milliamp setting on
this fluke one double seven so I.
Switched it over again note it defaults
to AC we push the orange battle to give us a secondary function which as you can
see on here hopefully the light's not obscuring it
too much I tell you what i'm working for a quick you just say you can see that as you can
see the secondary functions on the current readings here are the DC one's a
straight line with the dash is underneath and that's reached by
obviously pushing that button over there and as you can see we've got now got DC. Ok so let's come back and have a look I'm not going to switch
on the power supply again what's the led Led comes on well now we get a reading that's a
little more easy to read a little more accurate and we got better resolution
because now we you can see over here showing small M big a milli amps ok so millions 10 to the minus 36 . 16
18 So not many milliamps flying in here but there you go we're forming part of that circuit and
that's how we can read current or the volume of electricity being used by this
led and that's quite important fact because later down the line when we come
to do some more advanced measurements like power consumption you do need to make no voltage but the
more important fact besides voltage is the current which is
being used the amount of electricity because that can help you understand
what size battery you need what site so the panel you need all how
much power your house is using or particular plants so that's when things really do get
interesting and again we will cover that off when i start the more advanced
series on doing measurements with a multimeter so there you go how what I'll do just
fun i'm going to drop the voltage a little bit so we can see how the reading
goes down on the multimeter this is obviously set to auto range at
the moment so it will pick up the right range on the Fluke one double seven
you've got this range button where you can go and manually select a range so now it's only showing us . One of the
milliamp you can go and slip different ranges for your own preference and if
you hold it down for about two seconds it goes back to auto which is the far
easier motu you to use it in the ark times when you want to go to
manual range when you want to see a particular rate resolution or or reading
then that's where it can be very useful but again here we go just switch put up the the voltage and
it's now using 14.3 6 Milliamps and so we have some fun and games till
actually I blow this again camera increase the amount of current that my
path supply will give up we're at 2.2 .
51 Bolts at the moment and as we increase the pressure allowing
the led to use more and more current so what are we up to 50 going towards 60
would be nice as your voltage that's going to go out to say tell you what I'm
quickly going to stop here and get another fluke multimeter and we'll
measure the voltage at the same time just a bit of fun ok so what have I done
here for for a little bit of fun with the sir demonstration and as per the diagram of
actually got things connected up as they are here in this diagram that i showed
you earlier we've got our fluke one double seven
connected up so that it's in the path of the circuit it's part of the circuit to
measure current amount the volume of electricity flying through our light
which source which is an LED this time and then this digital multimeter over
here is a fluke 115 which is connected up so that it can measure the voltage ok so in this case you'll see i am using
these nasty little crocodile clips and these thin wise but remember for voltage
you can get away with doing that it's not best practice but you can do
that because you haven't got a lot of current flowing through these so here
they are positive negative positive lead is on the positive side of the LED over
here negative sign negative is over there positive is over here on this multimeter I flick through to the voltage DC
voltage black in the common rail diesel on the vault side and i'm going to
switch on the power source again so i keep an eye on the LED let's see when
the LED does liked up you'll see that the voltage they regard i can see you
can just see it come on their water we act about 2.2
Bots so now you seeing basically exactly what my variable power supply is putting
out I'm going to step the voltage up until
we blow the LED let's see what happens let's note the milliamp readings will be
getting up to 2.7 How much current and voltage can it take 60 yard when it can
I smell something 3.2 Let's step it up a bit quickly
80-odd milliamps almost a hand I can see it changing color at four volts you feel
it I can see it changing color so I know
things are going to change soon it's still there 12 any three my point 5
volts heavens it's taking a bit of punishment this is gone up into another range where
they were going to overload six fault 7 volts hundred and thirty-six saw a
flicker now just not what's going to happen here
on the side I leds dying bang there we go so there's another use I've
still got the power supply sit on the settings where blue so roughly around my
nod volts and as you can see we've actually blown a circuit inside this led
which is allowing it to pass electricity so we still have pressure obviously but
the circuit is is now broken so it's holding the pressure but the volume of
electricity that was flying through there and I forget it was a hundred and
something odds milliamp has now stopped because the circuit is broken anyway that there was a fun little
demonstration ideally hope you did learn something
from it if you do have any questions or what have you then certainly do person
and again I ask more senior and wiser viewers who watch this if you have
picked up any mistakes then do let me know so I can annotate and make the
corrections and thanks very much for watching as I said please do post any answers to
the quiz question and we'll cover that off in the next video and you think someone else might might
gain value from this video then certainly please do share it on your
twitter or facebook it certainly helps me and give it the
thumbs up if it was gave you any value at all thanks for watching and we'll catch you
soon.
Labels:
CURRENT
Thanks for reading How to use a Multimeter for beginners Part 2a - Current measurement. Please share...!

0 Comment for "How to use a Multimeter for beginners Part 2a - Current measurement"